It’s a simple fact that the smaller your photo files, the faster they can load, and bigger files result in longer load times. If you’re a photographer and you have a portfolio website to show off your work, you may not realise that longer load times are detrimental to your Google search results.
Why Do Smaller File Sizes Mean Higher Google Rankings?
Google (and other web crawlers/search engines) are all about user-experience. Users have short attention spans, so if a site takes a while to load, it’s likely that they’ll hit the back button and click on another result instead. This negatively impacts a site’s SEO (search engine optimisation) ranking, so it’s a bright idea to keep your site loading fast.

Click on the image to view my gallery photos in resolutions optimised for fast loading times and high quality to see what my settings look like on your device
However, you’re a photographer - you want high quality, high resolution images that look good on devices, to show off your body of work. So where’s the trade-off between quality and load time? Well, in Adobe Lightroom CC Classic you can save your own export settings and I’m going to give you a little cheat sheet below to help with that.
By the way, I don’t like to use Adobe Photoshop CC’s Save for Web function anymore - unless I’m specifically editing a photo in Photoshop and can’t be bothered to reimport it to Lightroom. But similar settings can be applied in that, too.

Adobe Photoshop CC 2020 Save for Web dialog window. It works in the same way as Lightroom CC Classic, but its interface is a little clunkier and I only use it when not working in Lightroom
What’s the Best Export Resolution for Web?
It seems Google are now ranking their results for both Desktop and Mobile devices equally, perhaps with an emphasis on Mobile as this is the way most users are consuming their internet these days. The latest iPhone SE 2020 has a screen resolution of 750 x 1334 pixels at 326 ppi density (pixels per inch). That resolution dimension may not sound like much, but when you see the ppi density - it’s pretty huge. And the majority of desktop monitors/laptop screens are at least 1920 x 1080 pixels with 72ppi.

Google now ranks sites equally for both desktop and mobile platforms, and may even be leaning towards optimisation for mobile for the first time ever
The Best Settings for Displaying Photos on the Web
A good balance between pixel density, image compression, and image resolution is what is needed here, so these are my recommended settings for good size photos for web use whilst maintaining small file sizes without compression artefacts compromising your shots.
Resolution: Longest side = 2000 pixels
Image Format = JPEG
Colour Space = sRGB
Pixel Density = 72ppi
Limit File Size = 500kB
Here’s a screengrab of my Lightroom CC Classic export settings for web use:
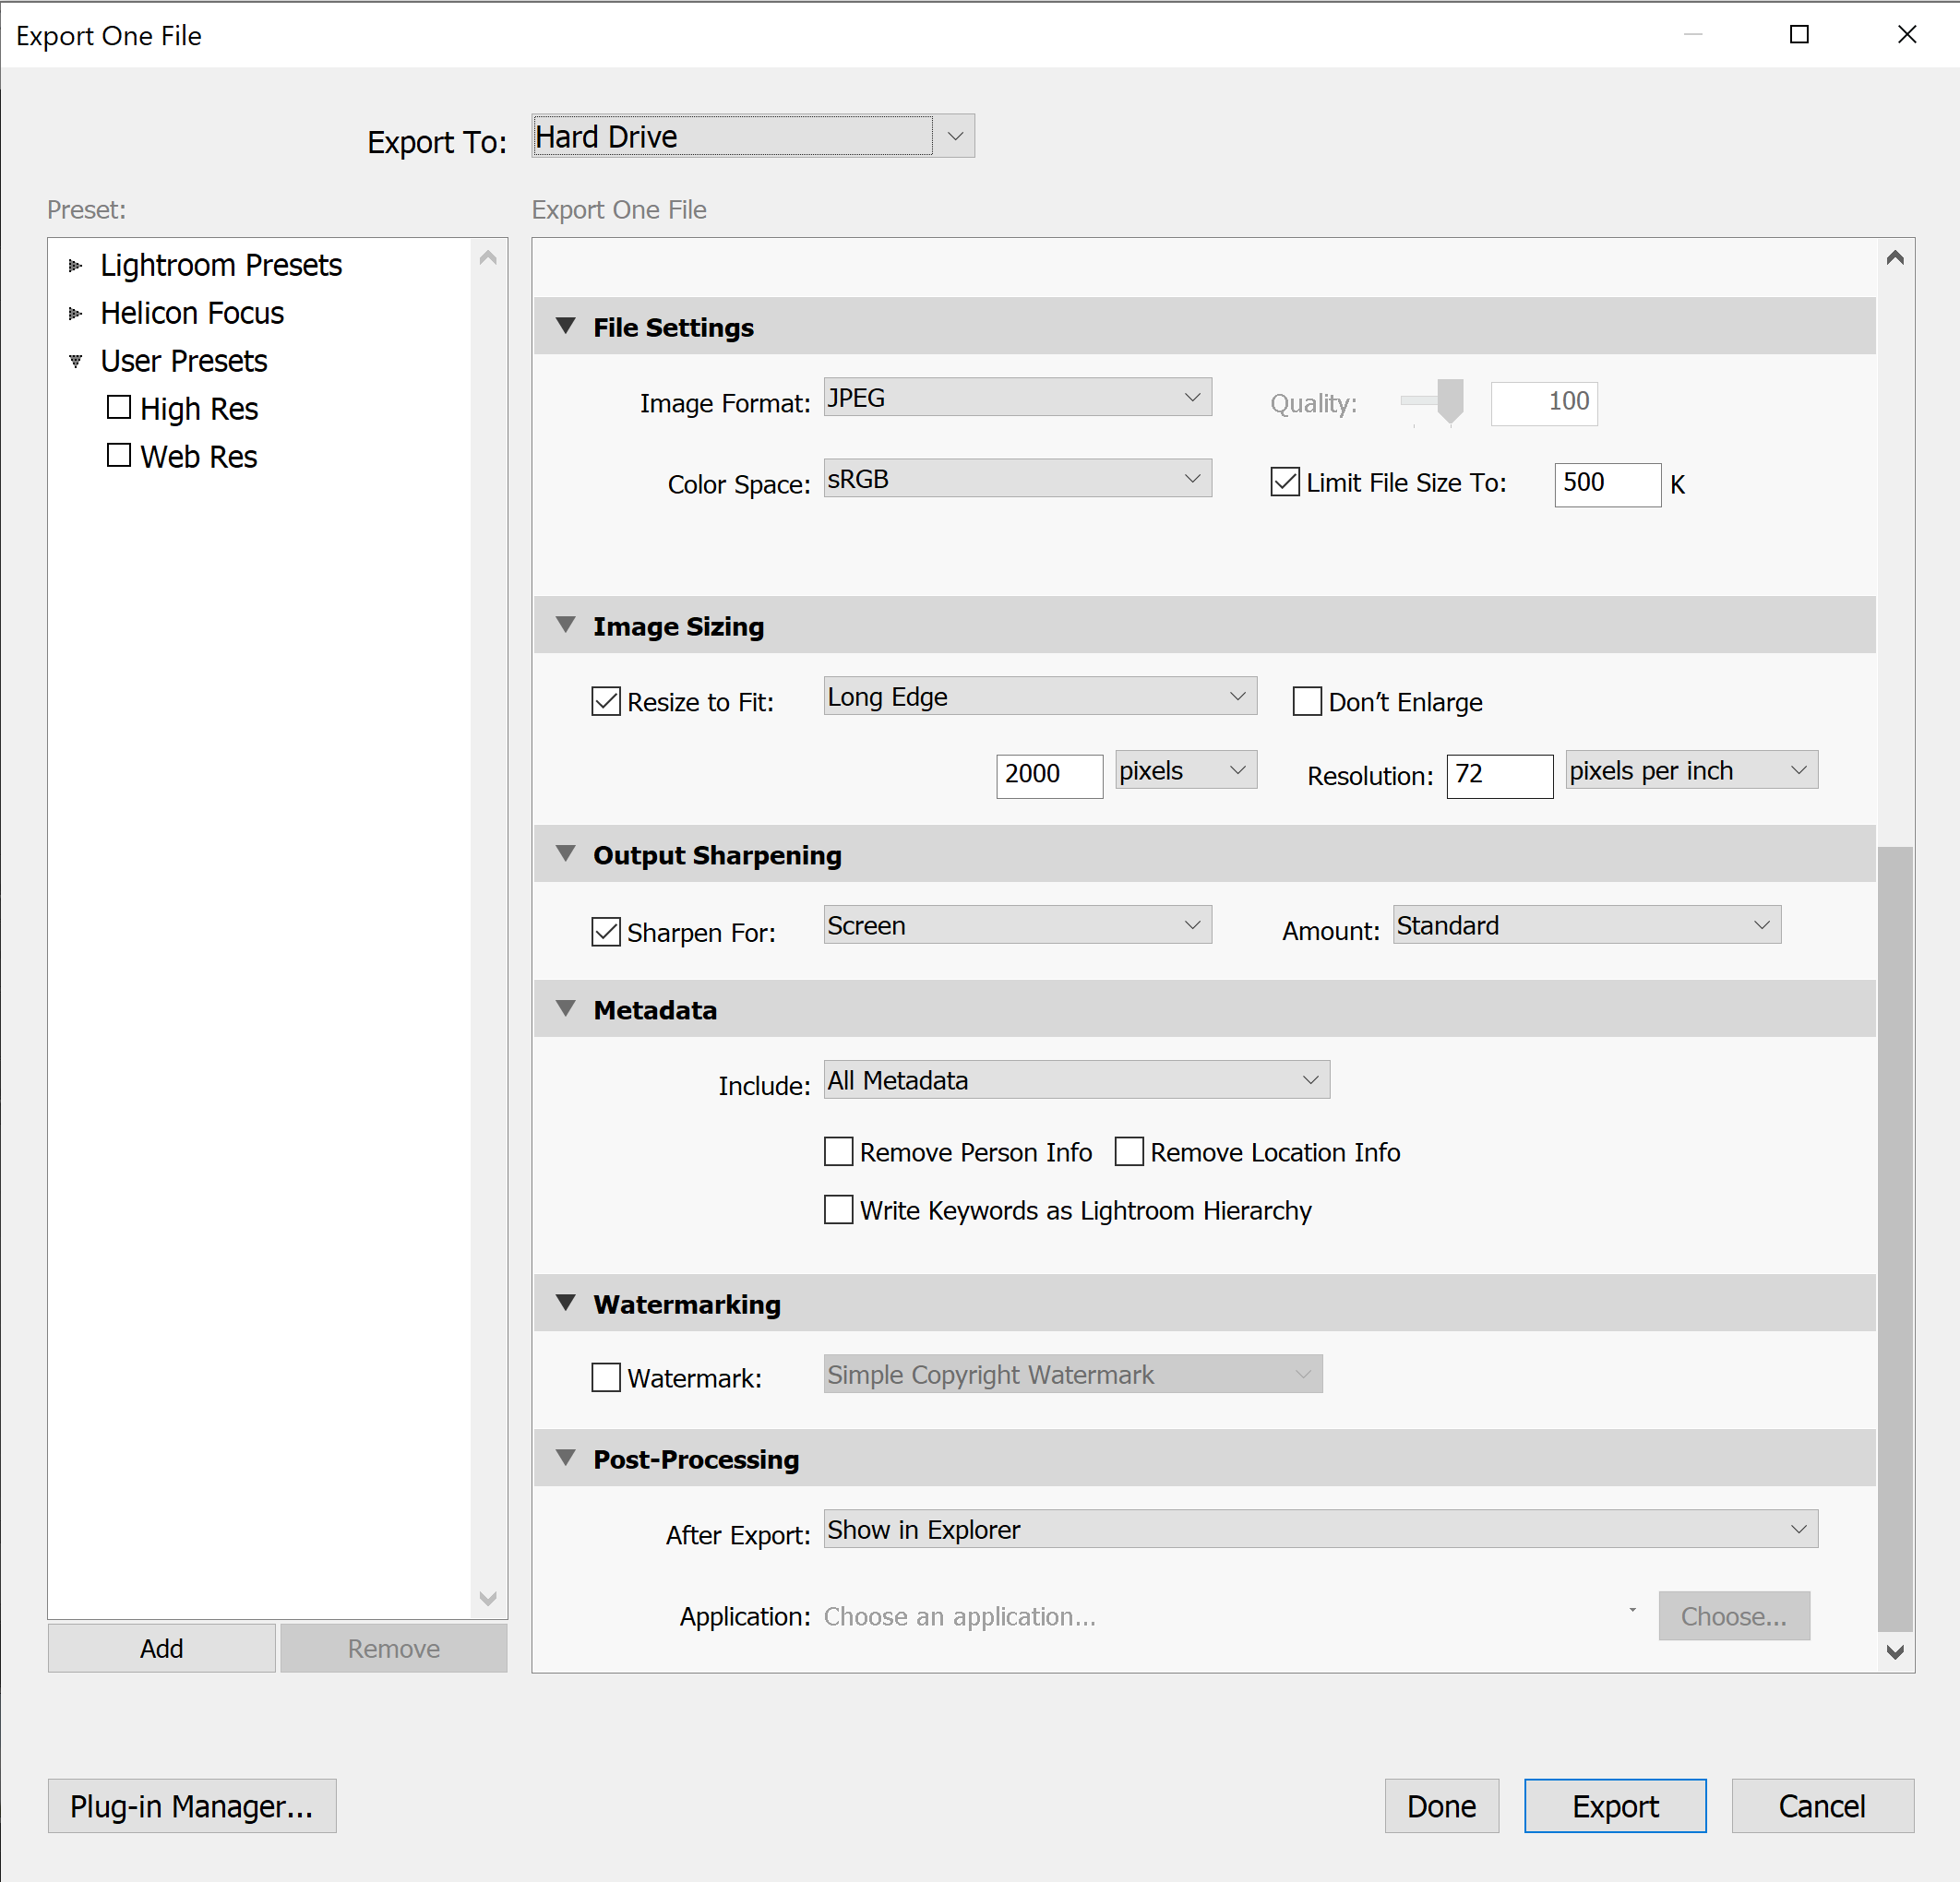
The export settings I use for my photos when I need to publish them on the web, including Sharpening for Screen to keep them looking fresh and clear
Add Export Presets
You’ll notice a few other features on my export settings. Top-left is my list of Lightroom Presets where I have a High Res and Web Res. I usually export my images to both, keeping High Res for archiving and printing, and Web Res for online use only.
Limit File Sizes for Smaller Files
The reason I limit the file size to 500K (or 500kB) is that I want my images to load quickly, without becoming pixellated. That’s also where the resolution comes in. Some photos are cropped differently, that might be 1:1, 5:4, 16:9 and so on. So it’s hard for me to include an exact rule for resolution dimensions. Therefore, my rule is ‘2000 pixels on the longest edge’. So whatever size my crop, the other edge will shrink to keep the aspect ratio the same, displaying the photo correctly - and not all distorted.
This macro shot of a honeybee is a great example of how sharp and vibrant your images can be whilst the file size stays small. Click on the photo to get a closer look, it only takes up 301kB of space!
Use Output Sharpening for Clear, Sharp Photos
I also use output sharpening for screen with the amount set to standard. Output (or export) sharpening is applied based on the output settings, and so optimises the sharpening based on this. Sharpening you do in the editing stage (with the Develop module if using Lightroom) is applied to the image at its highest resolution, so is rarely ideal if you’re planning to export files in a different size. I use standard because I don’t want to oversharpen my images as it causes halos around hard edges.